
Your Guide to Designing Electronic Enclosures & Racks

Electronics are great: they whirr, they blink, maybe it speaks in tones, it’s voice-controlled and “cloud connected”. But, since you likely want to protect this powerful heap of wires and circuit boards for many years to come, a robust electronic enclosure or rack is required. Creating optimal enclosure designs that reflect your requirements and intent can be a challenge, especially if it’s uncharted territory.
But where to start? This post will help guide you through the various options to hopefully save you time and unnecessary redesigns.
Let’s define enclosure first. Enclosures are four-post racks, often with front and rear doors as well as side panels. Using an enclosure provides enhanced security, controlled thermal management and a broader range of mounting options for accessories.
Step 1: Start with your product requirements
Racks and enclosures can be found everywhere. They’re on Navy ships, in airports, healthcare facilities, schools and enterprise data centers. They’re available in different heights, widths and depths. You should be asking yourself: what does my enclosure need to do and what are its most basic functions? Consider space and environment, equipment and cabling and ideal temperatures or airflow management.
The features highlighted above are necessary for a successful design, but don’t actually go into specific details. At this phase, its best to keep things as minimal and as streamlined as possible to give you flexibility.
PRO tip: enclosing electronics tends to increase the temperature of the system, so you may need to add a fan or some sort of heat rejection method if your components are getting too hot.
FEATURES | REQUIREMENTS |
Size: The most important attribute is how much rack space is required. | Height (in.) |
Payload: An estimate of the anticipated weight loading is key and vary widely depending on application. Our light-duty racks can accomodate 500 lbs whereas a heavy duty rack has an isolated payload of 1600 lbs. | Payload or weight loading (lbs.) |
Isolators: Are isolators required or will the enclosure need to withstand high shock and vibration? | Isolators: Yes / No |
End-of-row or bayed: Is the cabinet standalone (requires covered sides), end of row (side covered on one end) or bayed with adjacent cabinets (no side covers)? In a typical installation, you may have some of each of these configurations. | End of row: Yes / No, Qty |
Front doors/back doors & locks: Do you need solid or vented front/back doors? | Solid or vented? |
Rails/accessories: | Shelves, power panels, drawers |
Step 2: Get the right fit & the right materials
Use 3D modeling to create a rack that combines safety, functionality and cost-effectiveness. Dimensions are of course an important part of your final product, as is payload and weight. We’ve listed standard rack specifications, but custom configurations are also possible.
- Isolated Payload – 500 lbs.
- Standard Height – 72 inches
- Standard Weight – 100 lbs.
- Isolated Payload – 1200lbs.
- Standard Height – 72 inches
- Standard Weight – 130 lbs.
AJSR / AJMR (heavy duty) racks
- Isolated Payload – 1600 lbs.
- Standard Height – 72 inches
- Standard Weight – 267 lbs.
After you’ve determined how much space you need, there are several factors to consider when choosing the proper material for your electronic enclosure or rack. You need to consider: durability, malleability, availability and overall cost. And don’t forget about the end-use application. If your rack needs to be placed outdoors, withstand extreme temperatures or high moisture levels, you’ll certainly want a material that is durable and nonpermeable.
 At A&J, we build aluminum racks. It’s a lightweight, corrosion-resistant metal that can be chem-filmed or left unfinished with an ability to withstand high temperatures. And due to this extreme versatility, the process of extrusion can lend itself to even more complex designs. Pure aluminum for commercial use has a tensile strength of 90MPa. It can be used in several applications including food & beverage, marine, pharmaceuticals, telecommunication, and aerospace/defense.
We stock Aluminum 6061-T6 and alloy 6063-T5 for the extrusion material and 5052-H32 and 6061-T6 for sheet metal. 5052 is ideal for sheet metal enclosures since it can be bent to a tight radius without cracking and easily machined.
PRO tip: metal can’t typically be formed into a true 90-degree corner. Instead, your or one of our designers will help you specify a bend radius where necessary. Our designs use a unique bolted-together assembly methodology that eliminates the need for welding.
Step 3: Let’s Accessorize
Rack accessories such as shelves, panels and drawers provide a finished appearance, add security and improve your work efficiency. Interior accessories such as power panels, brackets or fans can help reduce clutter and improve general system operation.
Accessories (by product category) | |
Fans, fan trays and blowers | |
Power strips and distribution, cable support | |
Internal Slide Hardware | Mounting brackets, slide brackets |
External Panels & Hardware | Blank panels |
Fixed and sliding shelves, sliding drawers | |
Isolators | Wire rope isolators, shock absorbers |
Accessibility
Due to our unique, bolted-together design, side panels can easily be removed from outside which will greatly enhance accessibility to interior components and cabling. You can easily swap in/out various kits as electronic equipment changes or move them around. You can even move the entire enclosure with relative ease.
Usable cabinet depth
The usable depth in a cabinet rack is the maximum usable space and typically varies from approximately 17″ to 42″. The addition of connectors and cabling from the rear panels of equipment or instruments can add several inches to cabinet depth requirements. You also need to factor in all accessories such as power strips, cooling devices and mounting brackets.
-

- Power Panel

-
- Power Strip

-
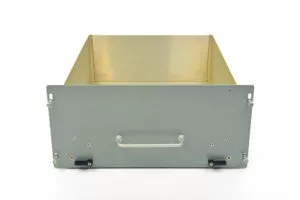
- Sliding Drawer
-
- Sliding Shelf Kit

-
- Sliding Tray Kit

-
- Sliding Tray Kit

Step 4: Finishing
Powdercoating – a type of dry thermoplastic powder, its available in a variety of colors, gloss levels and textures and widely recognized as the industry standard for painting metal. It provides a cost-effective, high quality and durable finish.
PRO tip: powdercoating adds an extra layer to your enclosure and its recommended that you add an additional .003″ to .005″ per side.
Chemical Conversion Coating – often referred to as chem-film or chromate coating, it creates a corrosion-resistant and durable surface that exhibits stable electrical conductivity.
Anodizing – an electrochemical process that converts a medal surface into a decorative, durable anodic oxide finish.
Bare Metal Finishes – offered in three basic types:
- No finish – parts are de-burred with no additional finishing, and may exhibit small scratches or swirl marks
- Grained finish – part is de-burred, and then given a specific linear grain direction via brushing
- Tumbled finish – smoothens and imparts non-directional finish via tumbling in abrasive medium
Hopefully this guide gives you helpful guidance for designing your own product enclosure. Contact us for more detail on a particular enclosure design feature or schedule a chat with one of our engineers. You can also browse our FAQs.